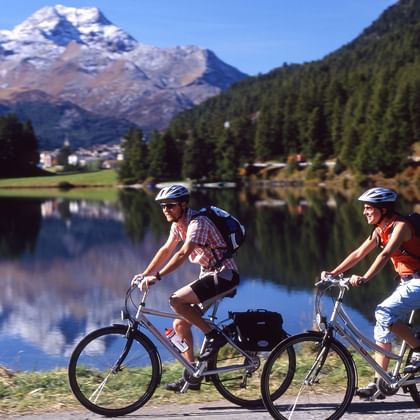
Here you will find tips and tricks for your bicycle trip. You will also receive this information in printed form when you book a Eurotrek bicycle trip.
Just let us know if you need more information on the above points - we will be glad to advise you!
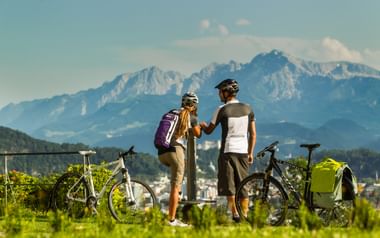



Cycling requires clothing that meets high demands: it must protect against weather conditions, keep the body warm, transport moisture away from the skin and, at the same time, be as light as possible and take up less space. For this reason, the "onion principle” is generally used here; various layers of clothing are used, which when combined in a specific way, can meet these requirements.
Basically you should use the following clothing items:
- The 1st layer, which is worn directly on the skin. This layer keeps the skin dry, thus preventing you from freezing due to sweat on the skin. Use underclothing made of wool (for e.g., Merino), synthetic materials or mixed fabrics.
- The 2nd layer is for insulation. It is important that this layer transports moisture outside. Materials such as fleece, Polartec, Primaloft or down should be used for this layer. Windstopper and SoftShell can be used as well because they are not completely waterproof.
- The next layer protects against the wind and rain. Suitable materials are either coated with or made of wind-resistant and water-resistant materials. This layer is usually the most expensive one as very high-quality materials are used. This layer should also transport moisture to the outside through incorporated membranes or zips.
It is important that every layer meets the specified requirements. This clothing chain is only as strong as its weakest link: the most expensive rain jacket is of no use if it does not allow sweat to pass through it.
TIP!
Ensure a balanced combination of your clothing items.

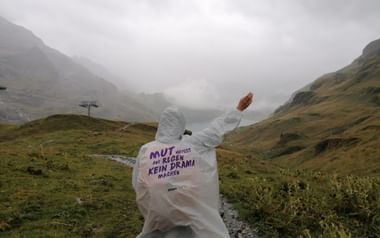
Ponchos can be easily stowed away in a saddlebag and would seem to provide good protection against rain. But since they are open at the bottom, they don’t protect against splashing water. Moreover, wearing a rain poncho while cycling can be very dangerous because of the wind. Yet, it's better to have a small poncho at hand rather than having to end a leg of your journey because you are soaked.
Since feet get cold very quickly when they are wet, waterproof leggings and overshoes prove to be useful in bad weather. It is important that they are sealed well with an elastic band at the top.
Head wind can also cause the hands to become cold quickly. Good gloves are windproof and waterproof and can be kept in the saddlebag.
If it rains during a leg of your journey, cold hands or feet can make you really uncomfortable.
Moreover, most of the body heat is lost from the head. This is particularly dangerous when cycling through head wind; so think of wearing a windproof headband or cap beneath the bicycle helmet. These keep the head and ears warm even in cold wind.
You can get waterproof coatings for helmets. These ensure that the helmet protects your head from heavy rain. Good coatings are also breathable. We especially recommend designs in neon colours that will make you more visible during bad weather.
TIP!
When packing your saddlebag, think of different weather conditions to be prepared for any eventuality.

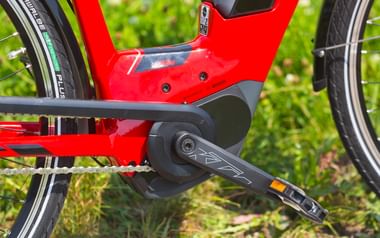
Clipless pedals ensure optimum power transfer from the foot to the pedals. Pedalling becomes much easier because you can exert force even when you lift your leg because you are in direct contact with your bike.
Most pedals release when you swing your feet to the side as if you're getting ready to get off the cycle.
Similar to ski bindings, your feet are connected to the pedals. So the use of clipless pedals requires practice so that you don’t get caught on the bike while getting off.
TIP!
When you use clipless pedals for the first time, practice getting off the bike on a soft meadow!
If you intend to use clipless pedals, you will have to carry them with you on your trip along with the right shoes and mount them and take them off yourself.
Even if you don’t have click-on shoes at home, you should use shoes with a slightly harder sole for your bike ride. Especially on longer tours, the pedal pressure can take its toll on the soles and cause pain in the ball of the foot or even cramps.
TIP!
Pack a foot care balm into your suitcase; your feet will thank you after a long tour!

If you are going to spend several days in the saddle, it is important that you adjust your rental bike correctly at the start of the journey, because a wrong position of the saddle can quickly lead to problems.
Wrists, back and knees suffer the most due to wrong seating position. If you experience problems in any of these body parts, try changing the settings on your bike.
TIP!
Tell us your height when you make your booking. This will help us give you a rental bike with the right frame size and it will be easier for you to make the right settings.
The saddle height is correct if you can reach the pedals with your heel with your leg stretched. Often, the saddle height is adjusted too low out of habit. This is why you should only adjust this setting upwards, otherwise you will end up sitting too low.
Depending on the bottom bracket height and frame geometry, you will usually be able to reach the ground only with your toes if the saddle height is adjusted correctly.
Ideally, pedalling is done with the ball of the foot. If you want to kick with the heel or midfoot, you should raise the saddle slightly for optimum power transfer.
Also make sure that your back stays straight and stretched. If you bend your back in the lumbar area when grasping the handlebars, you should lower the saddle slightly from the front.
As a rule of thumb, the handlebar should be positioned about 5 to 10 cm above the saddle. This results in a comfortable back angle, which can be maintained over longer distances.
Women often like to sit more upright than men. So, just adjust the bike as it suits you best.

Several successive legs of a bike tour can be very arduous and painful. This is because of the unaccustomed strain on the ischial tuberosity because of the weight placed upon it when cycling for long hours.
To resolve this problem immediately, lower the saddle nose slightly from the front if you are in pain. However, since you slide forward more easily, more weight falls on your wrists, which can lead to discomfort in your arms and shoulders.
TIP!
The ischial tuberosity hardens with time. So you should cycle more often before your bike tour.
Normally, the saddle should be horizontal; women like to have the saddle nose slightly lower than men. Basically, adjustments to the saddle are intended only for fine tuning of the pedalling angle and the seating position.
As a precautionary measure, we recommend that you wear special cycling pants. The padding on the back serves as cushioning and takes some pressure off the ischial tuberosity. Alternatively, you also get special underclothing for cycling, which comes with such padding and can be combined with normal everyday clothing as well. But make sure that your clothes do not have any seams that can rub while pedalling. Jeans are particularly tricky.
You can also use deer tallow cream to avoid skin irritation on the backside or on the inside of the thighs. Apply it in the morning to avoid any problems during the day.
Also carry a gentle rash cream in your luggage just in case you get sore spots.

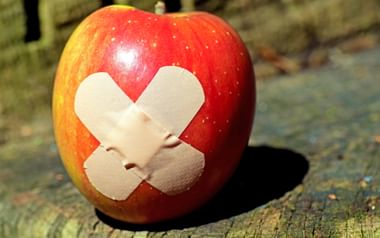
Big and small accidents can happen even to experienced bikers. And even if it's just little things or you are not even directly involved in the accident, a well-stocked first aid kit can be very useful. Make sure your first-aid kit includes the following items:
- Plaster (blister plaster, general plasters of different sizes)
- Sterile compresses
- Bandages
- Emergency bandage
- Triangular scarf
- Tweezers
- Tablets for headaches/painkillers
- A pair of scissors
- Safety pins
- Alcohol swabs
- Disinfectant
- Hydrophilic compresses
- Rescue blanket
- A pair of gloves

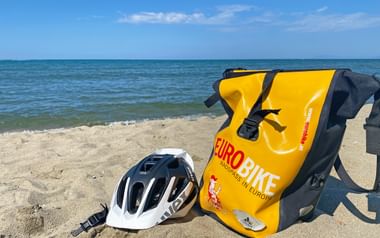
Be careful not to pack too much weight into your saddlebag. A heavy bag can destabilise you and impede you on slopes. When you park your bike or get off it, make sure the saddlebag does not unbalance the bike when you leave it.
You should pack the following in your saddlebag:
- Functional jacket, rain trousers, leggings
- Perhaps a pair of shorts
- Fleece/insulating jacket
- Light-weight gloves
- Cap or headband
- Sun hat/cap, sunglasses
- Sunscreen lotion, lip balm
- First-aid kit
- Pocket knife, tool
- Replacement hose, repair kit, pump
- ID, tickets for transfers if required
- Mobile phone (check the charge on the previous evening)
- Drinking bottle
- Tour book, documents for the day
- Hotel list (in case there are several accommodations at the stopover location)

In Eurotrek tours, you are sometimes out in the open air all day long. Remember that the sun is stronger in the mountains or near water. So people with any skin type must use a suitable sunscreen. Don’t forget to put it on even though it is often cool at higher altitudes or when the wind blows.
A sunburn or sunstroke can make a bike tour very uncomfortable; you may even have to end it prematurely.
Please remember:
- Protect your skin with cloth. Long-sleeved shirts and a pant can be useful even at high temperatures.
- Protect your eyes with sunglasses that absorb UV rays.
- Always use headgear in direct sunlight.
- Drink enough water throughout the day.
- Always apply sunscreens half an hour before exposure to the sun. Protect your lips by using a special lipstick/lip balm with SPF.
- Apply moisturising cream in the evening to nourish your skin.

Flat tyres can hold up even the best of cyclists. If you have booked a rental bike, you will receive a repair kit, replacement hose and pump. Ensure that at least one person in your group always has this material with him/her.
For your bike tour, you must be able to mend a flat tyre yourself. The important steps are briefly explained here:
1. Unhook the brake and remove the tyre from the bike. To release the rear tyre, it helps to switch to the smallest cogwheel at the back.
TIP!
Place the bike on the left side to avoid placing any weight on the derailleur. This is the most sensitive part of the bike!
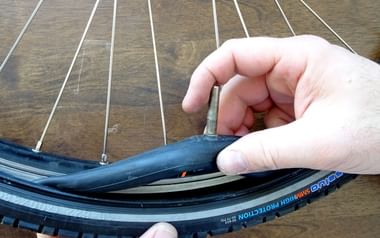
2. Use the tyre lever to detach the casing from the rim on one side. Then pull the hose out of the tyre. Sometimes you have to remove the valve cap to remove the hose. Remember how the hose was in the tyre!
3. Pump some air into the tyre and compress it. The escaping air normally reveals the position of the hole. The hole also gives indications of the cause of the flat tyre. Even the casing can have splinters that pierce the holes in the hose.
TIP!
Make sure you have eliminated the cause of the flat tyre before remounting the hose.
4. Mending the hole:
a. Sand the area around the hole with the paper from the repair kit until it stops shining. Now don’t touch this area with dirty fingers.
b. Spread the rubber solution over the hole to form a thin film.
c. Wait till it dries completely and then place the patch on the hole.
d. Press the patch down for about 2 minutes.
5. There should be some air in the hose so it can be pulled up properly. Start at the valve and work your way evenly in both directions. Lay the hose as straight as possible on the rim.
6. Starting from the valve, insert the tyre casing back into the rim. The casing must never rest on the tyre.
7. Ensure that the tyre is fitted properly before fully inflating and using it. It's easier to bring the tyre over the brake pads when it's not fully inflated.
8. Remounting the tyre:
a. Quick clamps facilitate the mounting and removal of tyres, but are a bit tricky to use. They should be tightened with a good strong jerk. If they are not tightened properly, the tyre may come off while cycling! So there is a huge risk of injury!
b. For the rear tyre, the chain must be placed over the smallest cogwheel again.
TIP!
Be sure to check your brakes before you leave.

Physical activity leads to the loss of fluids and salts. In order to maintain performance capacity, it is important to take adequate replenishment.
We have the following recommendations to ensure the right energy intake for your bike tour:
1. Drink enough fluids
An adequate supply of drinks should be at the top of your packing list for every bike tour. Dehydration is almost always the main reason for a performance slump, because even half a litre of less fluid in the body reduces endurance significantly.
Do not expect that you will be able to refill your water bottles on your way. Especially in southern areas there are few public wells and smaller villages are often quiet and empty at lunchtime. Drinking from dirty sources and rivers is not recommended, as it can affect digestion badly.
TIP!
Don’t try to save on weight by carrying less water.
Water, unsweetened herbal or fruit tea and sufficiently diluted fruit juices are suitable fluids for a bike tour. If possible, do not consume drinks that are too cold.
2. Energy sources to munch on
Vegetables that are cut into bite-sized pieces not only make for a healthy side dish, but also a small energy source to munch on. Carrots, peppers, radishes or cucumbers can be taken in a small bag.
Make sure that fruits are stored properly and are not getting crushed in the backpack. Apples are easy to eat and good as a snack. Trail mix (dried fruit and nuts) is easy to take along and is a quick source of energy.
Chocolates are also a quick source of energy but they melt easily. Store them in the middle of the saddlebag so that you can enjoy them even after a long journey.
3. Lunch
During the picnic, take care not to eat food that is too greasy and too heavy to eat. Wholemeal bread keeps you full for a long time and provides the body with fibre. Butter on the bread is not essential and melts easily on warm days.
4. Dinner
After a longer bike tour, it is important to refill the emptied fluid and carbohydrate stores in your body. Therefore you should hydrate yourself properly even after the tour. A steaming plate of pasta in the evening makes you fit again for the next leg of your Eurotrek bike tour.

We deliberately avoid renting helmets because only a well-fitting helmet provides sufficient protection. Wise heads will protect themselves!

Downhill
- For a longer descent, it is advisable to lower the saddle as briefly described above in order to lower the centre of gravity. This can help overcome some difficult passages as well.
- Try to take a central position on the bike so that you can shift your weight as required. You can cushion impacts using arms and legs - the looser you are on the bike, the better you will ride downhill.
- Some bikers reduce the tyre pressure before a downhill ride. The suspension fork should actually perform this task, hence it makes no sense to reduce the tyre pressure before a downhill ride.
- If you overdo it, you may also lose a feel of the track, and in extreme cases, the tyre may even come off the rim.
- While cycling downhill, bear in mind that there may be hikers in uninhabited stretches; also keep safe distance from the person in front of you. Serious accidents can take place especially in blind passages.
- Another important factor is the line of vision. The more you let your gaze wander over the surroundings, the easier it is for you to respond to changes in direction and the terrain. Here, too, it is important to keep your body slightly loose.
Uphill
- Look ahead while cycling and don’t change gear at full throttle.
- The seating position on the saddle makes a big difference while riding uphill. If the front tyre lifts slightly, slide forward and apply more pressure on the handlebar. If the rear tyre starts spinning, try shifting the weight backwards to put more pressure on it.
